Home > Milling Grains > Whole Grain Bread Making Tips
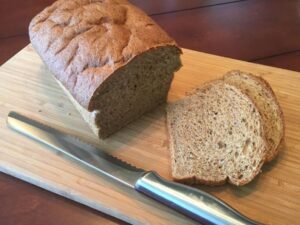
Let's make some Soft & Yummy full of Nutrition Whole Wheat Bread
You know, sometimes it’s that one little thing, that one little tip or trick which can make all the difference in a project’s success. Well, making whole grain yeast breads is one such endeavor. In this article I’ll be sharing my whole grain bread making tips; actually, t’s more of a resource page, long and detailed. You can read all the way through or just jump to the topic of which you have questions.
Making whole grain loaf bread can be a bit of a challenge and have somewhat of a learning curve
Part Science & Part Art
It could be said it’s part science and part art. But have no fear, if you are neither scientist nor artist, following these bread making tips will help you on your way to making wonderfully soft whole grain loaf breads from freshly milled flour.
Yeast Breads
When making yeast loaf breads especially, there are some basic “rules” for success. After much trial and lots of error, these bread making tips have helped me in my whole grain bread baking ventures. Yes, yeast breads typically have a “rise” time or two, but the end result is sooo worth the wait!
Be Patient
Also, when working with freshly milled flours, there can be a little bit of a learning curve, so be patient. For you will not regret your efforts if you don’t give up.
Some yeast loaf bread basic rules for successful
Click a link below to jump to the desired section
INGREDIENTS
Ingredients
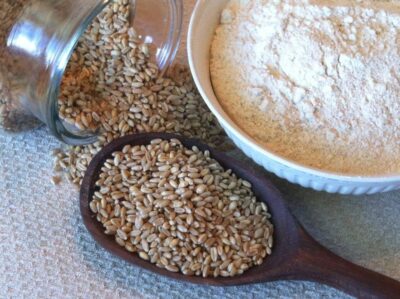
Whole Grain Flour
Whole grain yeast breads begin with the correct grains.
High Protein (Gluten) Content
Not all grains are created equal when it comes to protein. In order to obtain the rise and fluffiness desired, grains which contain a higher protein count will be required. These flour proteins when mixed with water form a grid or network of fibers known as gluten to give the bread elasticity and structure. Without the water no gluten would be formed.
Choose from this grain list for best yeast breads:
- Hard Red Wheat
- Hard White Wheat
- Rye
- Barley
- Spelt
- Khorasan/Kamut
- Einkorn
- Emmer
- Farro
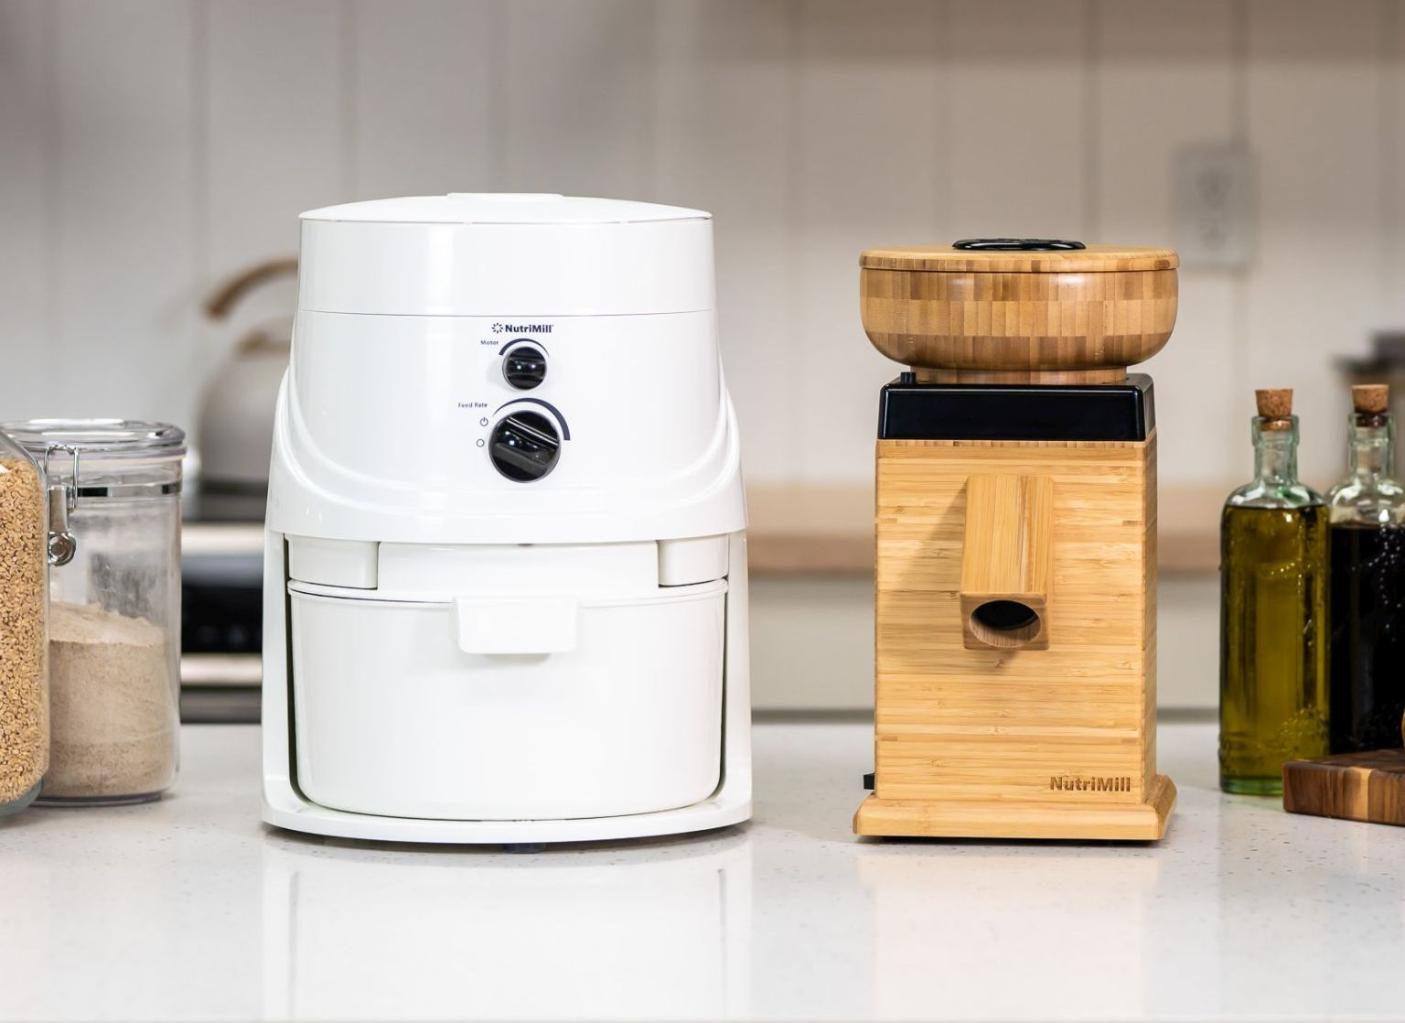
To get started milling your own whole grain flours, visit these posts:
Real Bread
Getting Started Milling
Buying and Storing Grains, Corn & Beans
Shop Grain Mills
If you do not mill your own grains yet
Measure of Flour
Most white flour bread recipes will call for a designated measure of flour. However, with freshly milled whole grain flours you will find there is typically a range to the measure. This is due to the moisture content of the grain. So, instead of just 4 cups, you may need 4-5 cups of fresh flour. Sometimes you need a little more flour; other times a little less. If the recipe doesn’t say, then have a 1/2 cup or so more flour on hand, just in case.
More about that in the “Liquid” section
Leavening Agents
Yeast
With a host of leavening agents available for baking, yeast is the master of the high-rise.
Yeast provides the gasses to create the rise in the gluten fibers. If a lower protein grain is used, there will not be enough of the fiber network available to achieve the structure needed for a tall loaf.
In the yeast category there are several from which to choose:
- Naturally occurring yeasts by fermentation (sourdough)
- Baker’s yeasts: Dry active & Instant dry
Choose the one which is best for your baking end results. See my Ingredients page for more detailed information.
Choose the one which is best for your baking end results. See my Ingredients page for more detailed information.

Liquids
Liquids
When it comes to working with fresh milled flour, liquids are the boss.
Because moisture plays a huge role in the bread-making process; the amount of liquid used determines the amount of flour needed.
There must be sufficient water in the dough. When water mixes with the flour proteins, that’s what creates the network of gluten stretchiness.

Working with fresh milled flour – Since moisture is a key player, you really don’t know how much moisture is in the grain. Was it grown during a wet season or dry season?
The volume of moisture in the grain from the field will affect the liquid to dry ingredients ratio.
In other words, if the grain was grown during a dry season, (not much rain-fall), then the grain will not have much moisture within; so, when the liquids are added to the flour, the flour will absorb more of the liquids than it would if grown in a wet season.
**To help with this issue, after mixing and before kneading, allowing the dough to rest a bit, about 10-20 minutes before kneading. This will give the flour time to absorb the moisture for a softer bread, otherwise your bread can come out dry, heavy and crumbly.

Not enough moisture
in the bread will result in,
what I call, ‘brick bread’. Been there too many times. 😞
When ready to add additional flour, add just enough flour until the dough cleans the sides of the mixer bowl completely.
Too much flour = dry, heavy and dense.
See specific steps in the How To’s section below.
Liquid Temperature
To activate the yeast quicker, warm your liquid a bit; 110-115 degree range (baby-bottle warm). Warm-hot tap water is usually sufficient. If the liquid is too hot it can kill your yeast; if too cold, then the rise-time will take longer. I recommend having an instant read thermometer on hand for easy testing.
Liquid Options
There is not really a rule for liquid choice; really more of the results:
- Water – Most recipes call for water. Water will contribute to a chewier inside and crispier crust.
- Milk – Milk can be a great substitute for some or all of the water. Just be sure to warm it. Milk adds mild sweetness and lends to a softer texture and browner crust. Can keep breads fresher a little longer.
- Buttermilk – As with milk, some or all the water may be substituted. Again, remember to warm it as described above. Buttermilk or even yogurt adds a lovely tangy flavor and will create a more tender, softer texter.
- Juices – Juices such as jalapeno or apple may be substituted for some of the water to add extra flavor to specialty breads.
Fats
Fats
Most any healthy fat will do; healthy being the key word here.
- Cold Pressed Extra Virgin Olive Oil (my first choice)
- Coconut Oil– Virgin or expeller-pressed
- Melted Butter
- Seed Oils – I do not recommend refined canola, corn, vegetable (soybean) or sunflower oil. These are not an option unless it is organic and cold-pressed.
See my Healthy Ingredients page for full details.
Sweeteners
Sweeteners
For yeast breads you will need some sweetener for the yeast to “eat”. Depending on the bread you are making, only a smidgen of sweetener is actually needed. The following sweeteners are my go-to’s:
- Raw Honey – Honey is a great sweetener. It has lots of nutrition. I recommend only using raw honey; and buying local is even better. Using local raw honey can help with some sinus allergies because the bees use the pollen from your area which can help strengthen one’s immune system.
- Dehydrated Cane Juice – True brown sugar. Dehydrated cane juice, the first step of raw sugar; the cane juice with the molasses still in it. Because the molasses is still present it will have a robust sweet flavor. Sucanat is a brand name version which stands for sugar-cane-natural.
- Raw Cane Sugar – Dehydrated cane juice with the molasses removed. One more step of processing, but still better that bleached white sugar.
See my Healthy Ingredients page for full details.
Salt
Salt
Salt is important and plays many roles in the yeast bread making process. Not really skippable. I know, I know, we have been told to stay away from salt, but it’s vital for our body and vital in bread baking as well.
🧂 Add flavor, as well as compliment other flavors in your bread.
🧂 It helps control the yeast action by slowing the rise-time, allowing the developing of flavors.
🧂 Strengthens the gluten network, thus creating a better texture.
🧂 Be aware, salt can kill your yeast; so, it’s better to add it separately from the yeast.
Please read about salt on my Ingredients Page, it’s a very important ingredient.
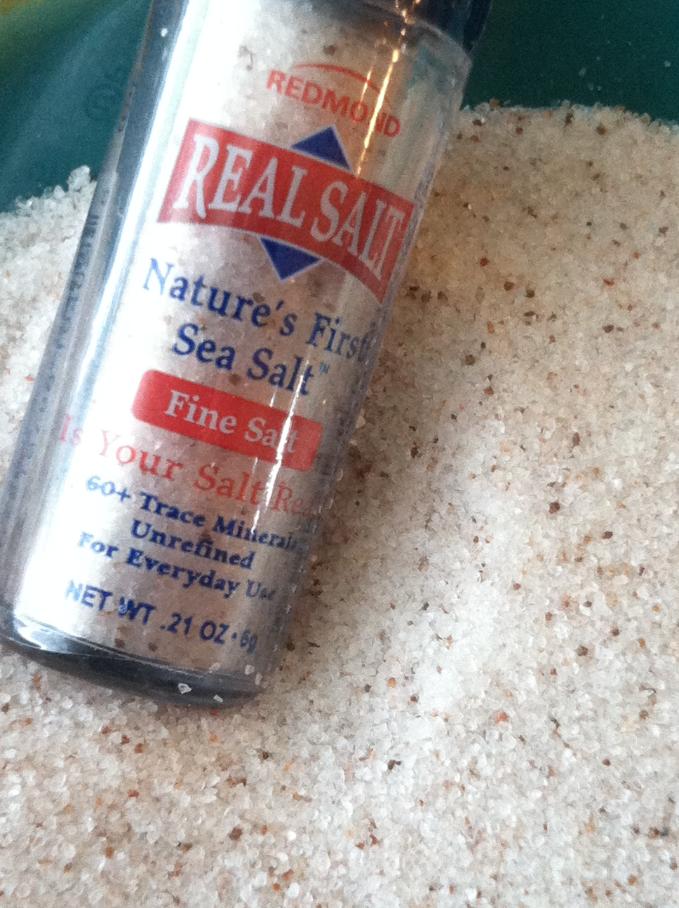
Pick your crystal. Different salts supply a different mineral collection level:
– Redmond’s Real Salt ( my favorite)
– Himalayan Pink Salt
– Celtic Sea Salt
Other Ingredients
Below are additional ingredients used to assist making yeast loaf breads; some needed, others, not-so-much. Definitely, check out my Ingredients Page for more details on all these additional ingredients, click HERE.
Gluten
Gluten, also known as Vital Wheat gluten is a totally optional ingredient. As discussed above, high protein grains, like Hard Red or Hard White wheats, naturally contain the fibers to form gluten. Sometimes adding a little extra gluten to your bread may aid in a better rise and a lighter and fluffier loaf.
A little goes a long way. One teaspoon of gluten per four cups of flour is sufficient.
Keep in mind, adding too much gluten will change the flour to fiber ratio, You see, commercial white flour is basically just gluten and starch (not to mention the sifting and bleaching). That’s a contributor to why so many people are having trouble digesting the white flour products; it’s not necessarily the gluten, but the ratio.
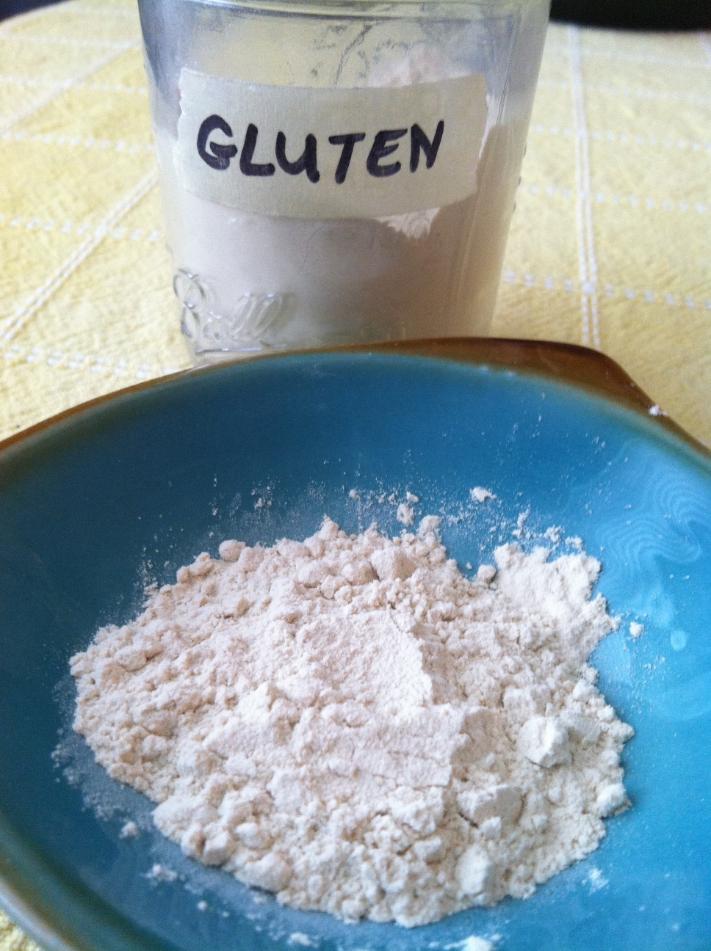
Note: Humidity can affect how well your loaf rises. Like a little super hero, gluten can come to the rising rescue. So, when the humidity is higher you may want to add a little extra gluten to get that dough to get-on-up-there.
Lecithin
Lecithin is also naturally found in wheat, aiding in the metabolizing of fat and cholesterol. I always recommend adding extra. Who doesn’t need more metabolizing, right?!
Lecithin is an emulsifier, which helps create a smoother, softer dough, resembling ‘store-bought’ breads. It can come from sunflowers or soybeans (however, I do NOT recommend the use of soy anything). I only use non-GMO sunflower lecithin.
Lecithin is optional, but I encourage it’s use.
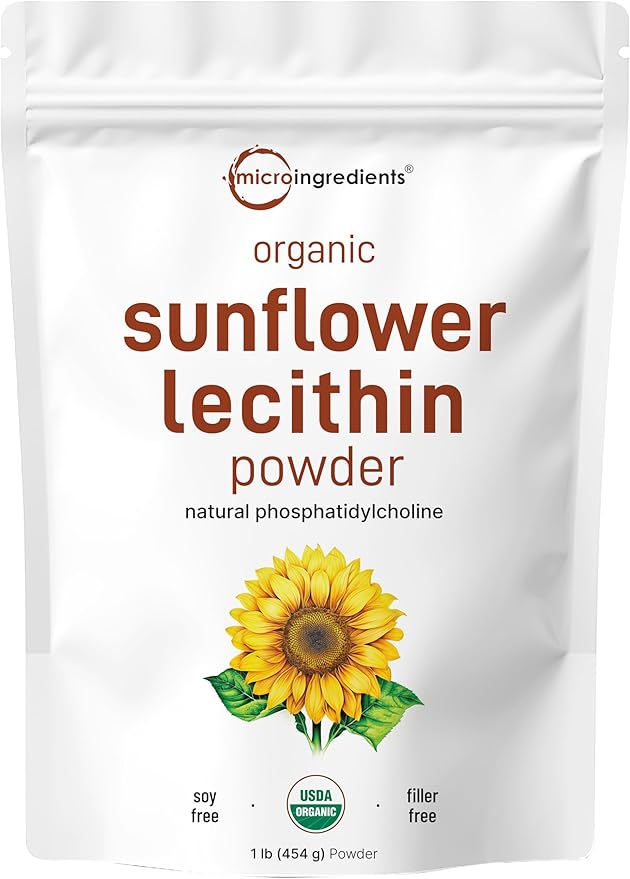
1 Tablespoon per 4 cups flour
Flax Seed
Flax seed is so full of wonderful nutrition such as the all-so-valuable fatty acids and omega-3s. For the body to use flax seed properly, they need to ground into meal. The body doesn’t utilize the whole flax seed as efficiently.
Ground flax seed – Once the whole flax seeds are ground into meal the protected nutrients and oils become available for simulation by the body. These oils help create a soft texture to the bread and aid in the rising of the dough. As with the grains, grind whole flax seed fresh using a coffee grinder of blender; never, ever put flax seed in your grain mill.
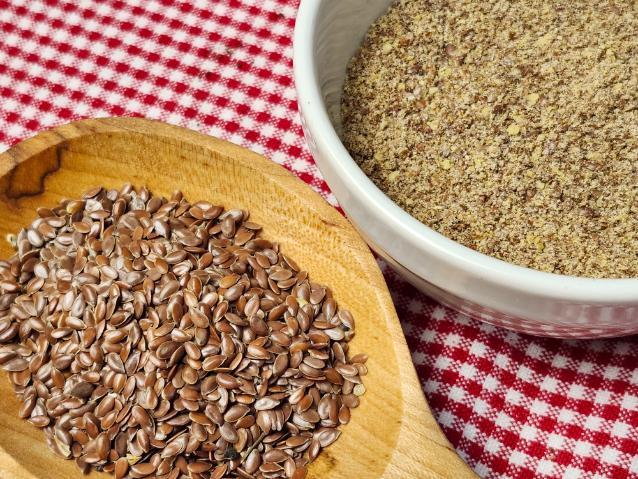
Whole flax seed makes for a beautiful garnish inside and outside the bread, a sneak peak of the nutrition within.
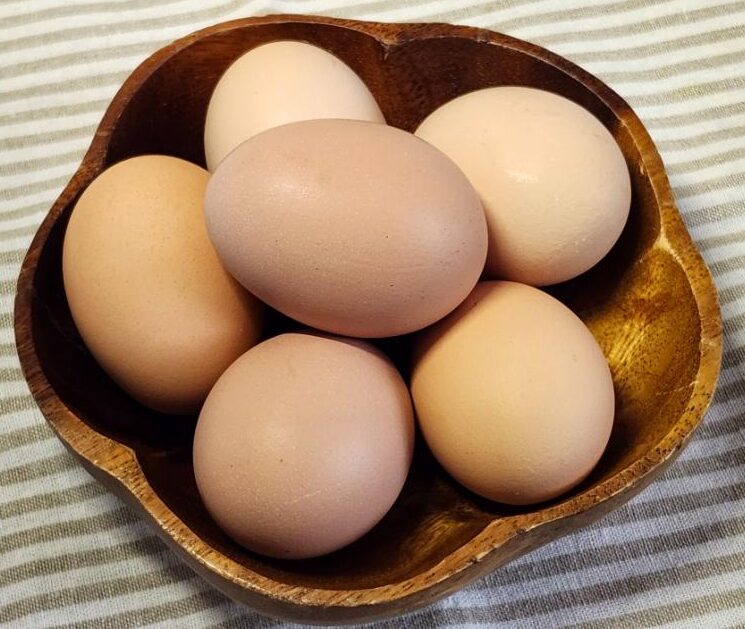
Whole Eggs
Whole eggs are a power-house of nutrition, hosing saturated and unsaturated fats and lecithin!
Eggs add not only nutrition, but flavor and a warm color to your breads.
Eggs are a leavening agent, therefore will aid in the rising of the bread; providing strength as well.
Whole flax seed makes for a beautiful garnish inside and outside the bread, a sneak peak of the nutrition within.
How To's
Now that you are familiar with the ingredients used for whole grain yeast breads; let’s get to making some of that beautiful bread. In this section I will walk you through step-by-step from mixing the dough to baking process.
Mixing the Dough
Typically, whole grain recipes will many times give a flour-needed range (6-9 cups). This is because the moisture in the grain itself can vary; therefore, the amount of flour actually required can also vary.
Since we don’t know about the moisture content in our freshly milled flour, start with only half (3 of the 6 cups) of the flour to add to your liquids (as described in the Liquids section). Blend well, allow to rest a bit to absorb some of that moisture. This step goes for those hand kneading as well.
Repeated from the Liquid section
Working with fresh milled flour – Since moisture is a key player, you really don’t know how much moisture is in the grain. Was it grown during a wet season or dry season?
The volume of moisture in the grain from the field will affect the liquid to dry ingredients ratio.
In other words, if the grain was grown during a dry season, (not much rain-fall), then the grain will not have much moisture within; so, when the liquids are added to the flour, the flour will absorb more of the liquids than it would if grown in a wet season.
**To help with this issue, after mixing and before kneading, allowing the dough to rest a bit, about 10-20 minutes before kneading. This will give the flour time to absorb the moisture for a softer bread, otherwise your bread can come out dry, heavy and crumbly.
Not enough moisture
in the bread will result in,
what I call, ‘brick bread’. Been there too many times. 😞
When ready to add additional flour, add just enough flour until the dough cleans the sides of the mixer bowl completely. – 1-2 revolutions
Remember, too much flour = dry, heavy and dense.
Mixing Steps
Step 1: Start with your liquids (water, honey, etc.) in your bowl first. Wait on the oil.
Step 2: Add your small dry ingredients: salt, gluten, lecithin, etc.
Step 3: Add 1/2 the flour and instant yeast on top.
Note: If using dry active yeast, proof first in the warmed water and some sweetener until bubbly, then follow as above. Sourdough requires more details; so, I won’t be covering it in this article.
Step 4: Stir or mix everything together well, for about one minute. This mixture should be kind of medium consistency, like thick pancake batter.
Step 5: Cover. Allow to rest for about 10-20 minutes. This is called “sponging”.
Follow the next section: “Kneading”.
Kneading
OK, you have mixed the liquids with the small dry ingredients and half the flour; and have allowed that mixture to rest or sponge. (See “Mixing” section above.) This step is adding the additional flour to make a soft dough, then the timer starts for kneading.
Kneading the dough is a very important aspect of yeast bread baking. In order for yeast breads to get tall and fluffy the gluten strands in the flour need to straighten out or untangle, which contributes to the rising process. There must be sufficient water in the dough. Remember water mixed with the flour proteins is what creates the network of gluten stretchiness.
Mixer & Dough Hook Kneading
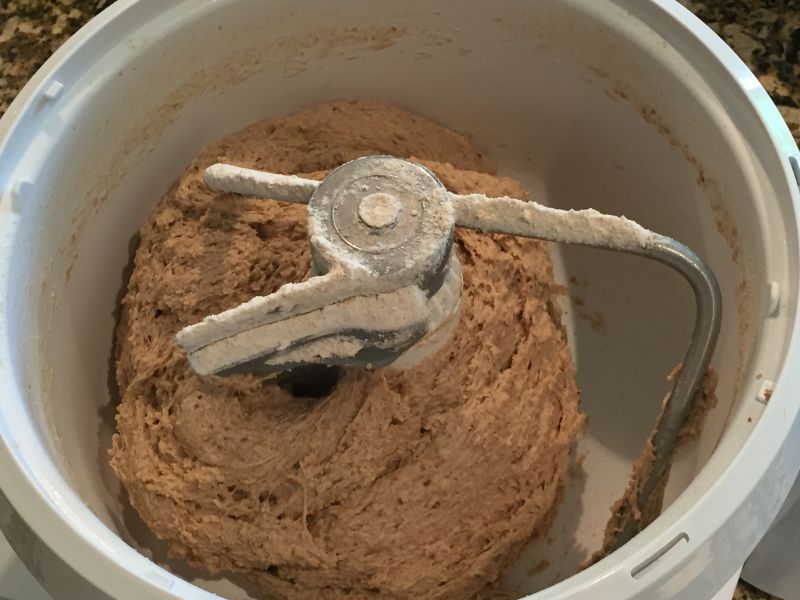
With your sponge in your mixer bowl and the dough hook in place, turn on the mixer on low speed and begin adding 1/2 to 1 cup of flour at a time. Allow the mixer to work in that flour a few revolutions.
***Keep adding flour, 1/2 cup at a time, UNTIL the dough pulls away from the sides of the mixer bowl and the sides are “clean”. When this happens, STOP adding flour and start your timer.*** Even if the dough looks too wet or it pools back down to the bottom of the bowl – DO NOT add more flour! Let the dough hook work in all the flour and get to work on the glutens.
The above part is VERY IMPORTANT!
Remember, it is better to error on the side of sticky than too dry. Meaning, it is much easier to add a little more flour than to add more liquid.
Knead the dough for 8 minutes or so.
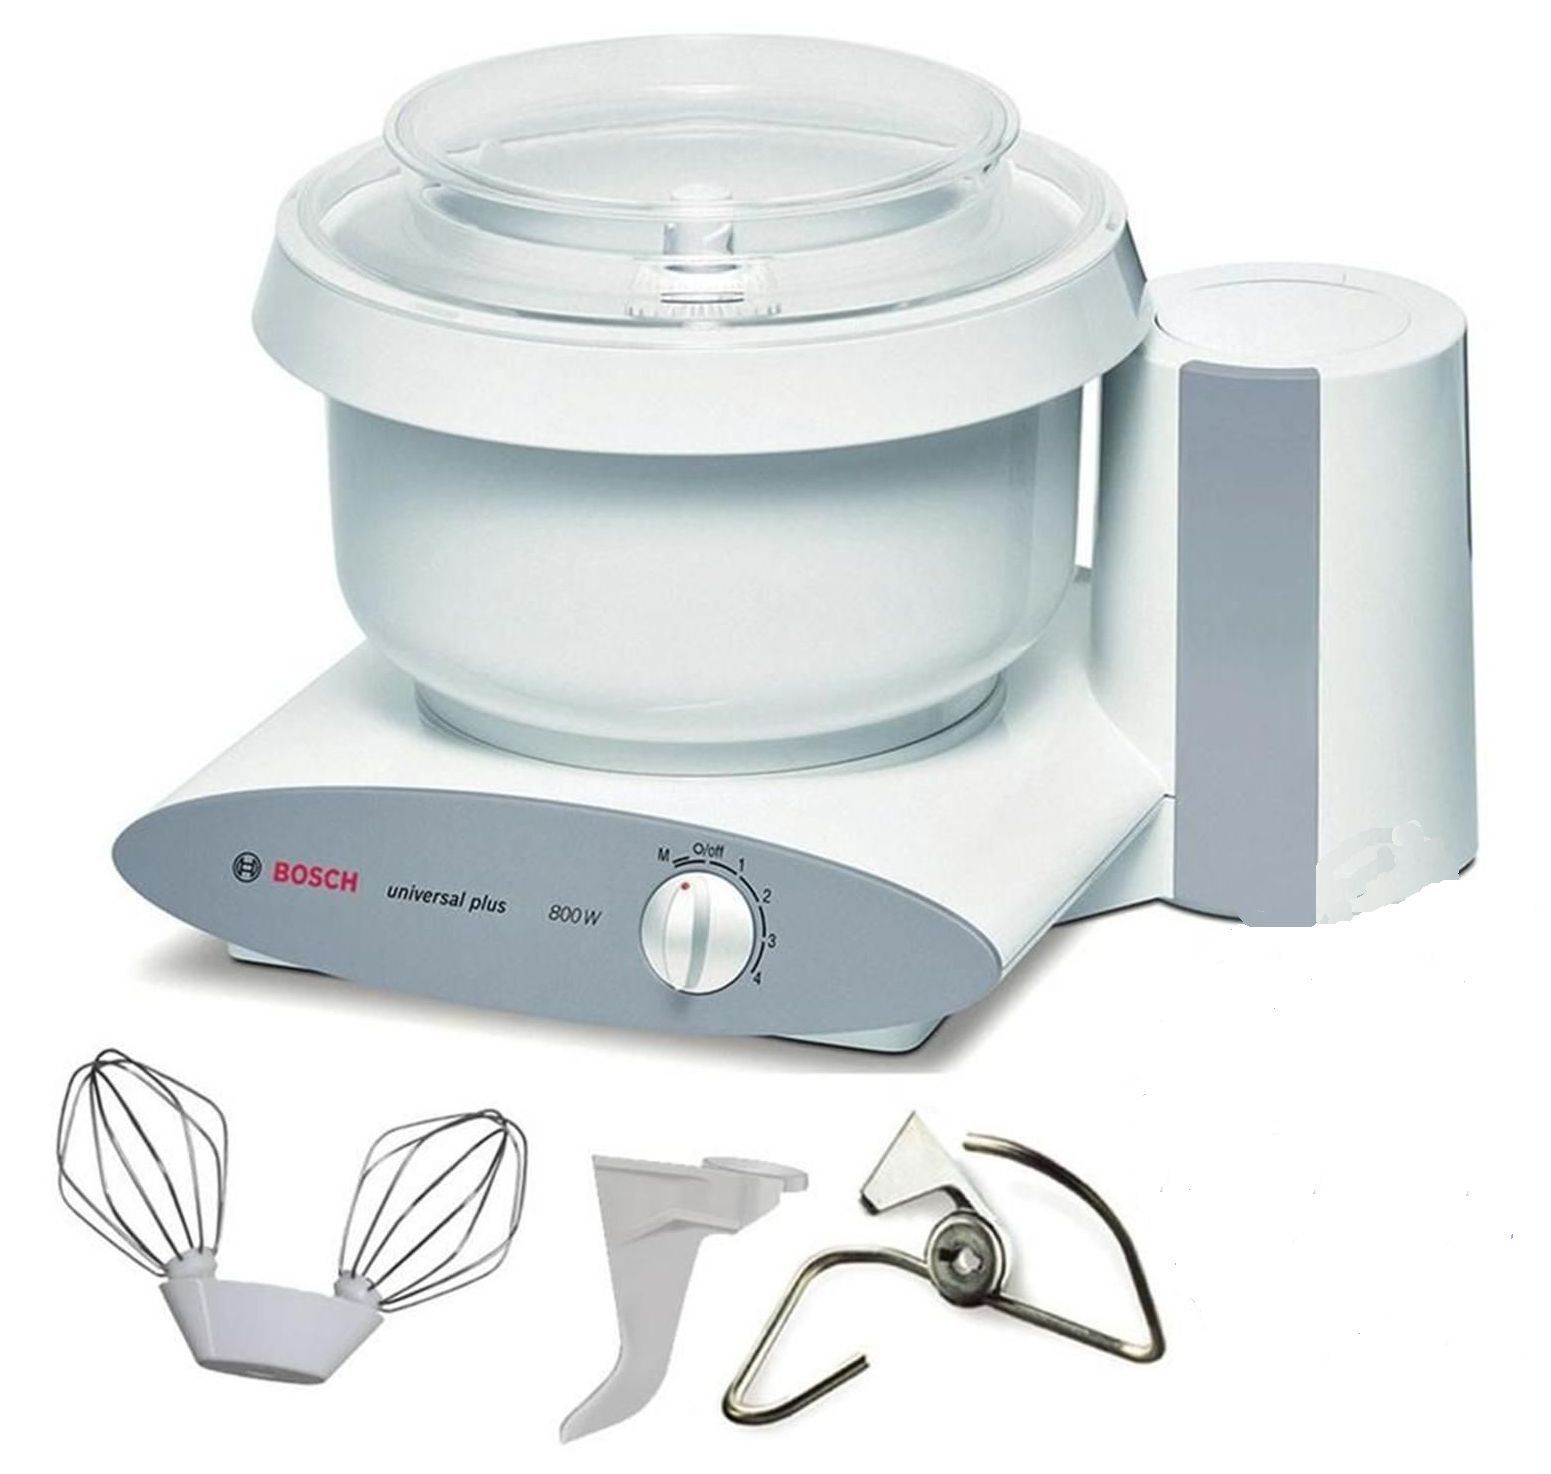
A mixer with a dough hook sure makes bread making easier; I use the Bosch Universal Plus Mixer.
Click these links to check out the mixers:
Bosch Universal Plus Mixer
NutriMill Artiste Mixer
Hand Kneading
Kneading by hand: In a large mixing bowl start with your liquids and small dry ingredients. Stir in as much flour as possible with a sturdy spoon; I like to use a wooden spoon.
When the dough begins to get too stiff for the spoon, switch to using your hands. Yeah, get in there! At this point only add 1/4 to 1/2 cup of flour at a time. Working it in the dough. Do not add too much flour. The dough will be sticky, now switch to the counter top to knead the dough and work in any remaining needed flour. You may or may not need all the recipe flour. You are looking for a “silky” feel to the dough.
To work on the counter top, you may sprinkle a 1/4 to 1/2 cup or so of flour on your work surface; transfer the dough to your work surface and working in that flour as needed to form a soft, silky dough. (See work surface note below). It will take a little longer by hand, about 10-25 minutes; but, hey, on the plus side your arms will get stronger. Score! Be sure to knead the dough long enough.
Hand Kneading Process
- With your dough on a lightly floured or oiled surface.
See note below. - Form a ball by stretching the dough from one side over to the center of the ball.
- Then press in with the heel of your hand.
- Rotate the ball a 1/4 turn.
- Repeating that action over and over until the dough becomes soft and stretchy.
Note: Working on the Counter
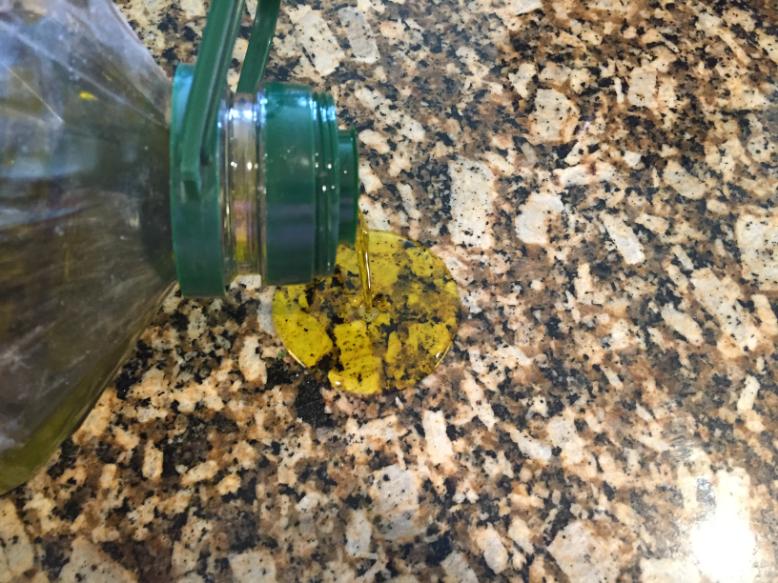
After sufficient flour has been added, you should switch to oil on the counter to keep the dough from becoming too dry.
Pour a little olive oil on the counter to finish the kneading process. This will help with any stickiness as well.

Other Things to Keep in Mind
Test the Stretchiness
To test if the dough is sufficiently kneaded, with oil on your hands, cut off a golf ball size piece of dough, knead it with your fingers a few times, then gently stretch the dough to make a thin flat piece. You should be able to hold the piece up to a light and see the light through it. If the dough easily breaks then more kneading may be required or the dough is too dry. If the dough is too dry it’s possible to work in a little more liquid, but keep in mind the gluten may become, again, exhausted.
Shaggy or Sticky Dough:
Your dough may also come out a little “shaggy”. That’s OK. Sometimes it’s just like that. But don’t be quick to add more flour. Use oil on your hands and worksurface and knead the dough a little longer by hand to smooth it out.
The way to test if it need more flour is to hold the dough ball in your hand; if it oozes over the sides, work in a little more flour by hand.
It’s better error on the sticky side than too dry. You just don’t want it stiff or dry; it will be heavy and not rise well. Again, it may need more liquid.

Not Kneading Enough
Not kneading enough: Your dough should have a smooth silky feel to it and stretch easily. If it tears easily when pulled, it could be too dry, but it may simply need to be kneaded longer.
If the timer has gone off and you touch the dough with your finger and dough sticks to it, knead another minute.
If the dough has not kneaded enough, the “stretch” ability won’t be there for the dough to rise well.
Kneading Too Long
Kneading too long: Dough can be kneaded too much, exhausting the gluten. It’s not typically the case; focus more on not kneading enough. Keep to your recipe’s directions and you should be fine. It’s more about the feel of the dough more than anything.
Over kneaded dough typically will barely rise or fall in the center during baking.
Using Dry Active Yeast
Dry active yeast typically requires two rises. After you have kneaded your dough, this would be the time for your first rise. If dough is in a mixer, no need to mess up another bowl, simply smear a little oil around the inside sides of the bowl, cover with plastic wrap or light damp kitchen towel. (In the Bosch, simply leave both covers on the bowl.) Allow dough to rise according to recipe directions.
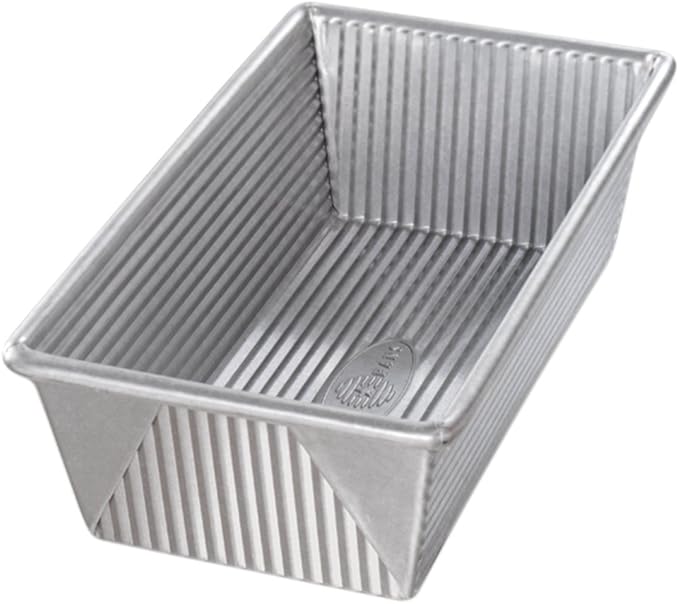
Pans
A quick note about bread pans: Yeast breads need pans with tall sides to support their weight. There are many sizes and styles from which to choose. Some require oil or greasing and some do not. Choose what best fits your needs.
- Silicone Coated Steel
- Heavy Gauge Steel
- Stainless Steel
- Cast Iron
- Enamel Coated Cast Iron
- Stoneware
- Glass
- Ceramic
- Non-Stick Ceramic
- Silcone
Bread Loaf Pans Sizes;
Pan 8-1/2″ x 4-1/2″ = 1 lb. dough
Pan 9″ x 5″ = 1 lb. 5 oz dough
Sandwich size loaf
Pan 10″ x 5″ = 1 lb. 8 oz dough
Family sandwich loaf
Note: For stuffed breads use 2 oz. less dough per pan. Be sure to grease your pan ahead of time; I use butter or coconut oil.
See the above “Weighing the Dough” section for more dough and pan information.

Stoneware is great for bread as well. If you season them well, they will serve you for many years.
My favorite bread pans:
9″ x 5 ” USA Silicone Covered Aluminized Steel Pans
Perfect sandwich bread size
These pan require no greasing.
Bread just slides right out.
Love that!
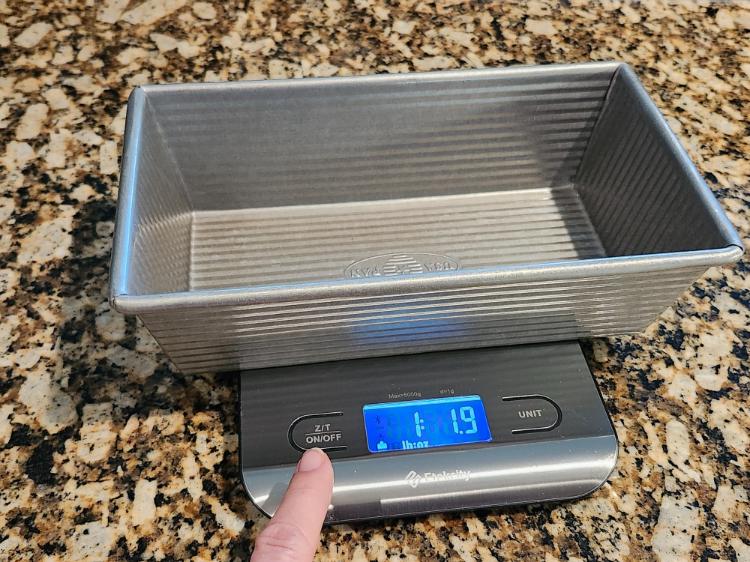
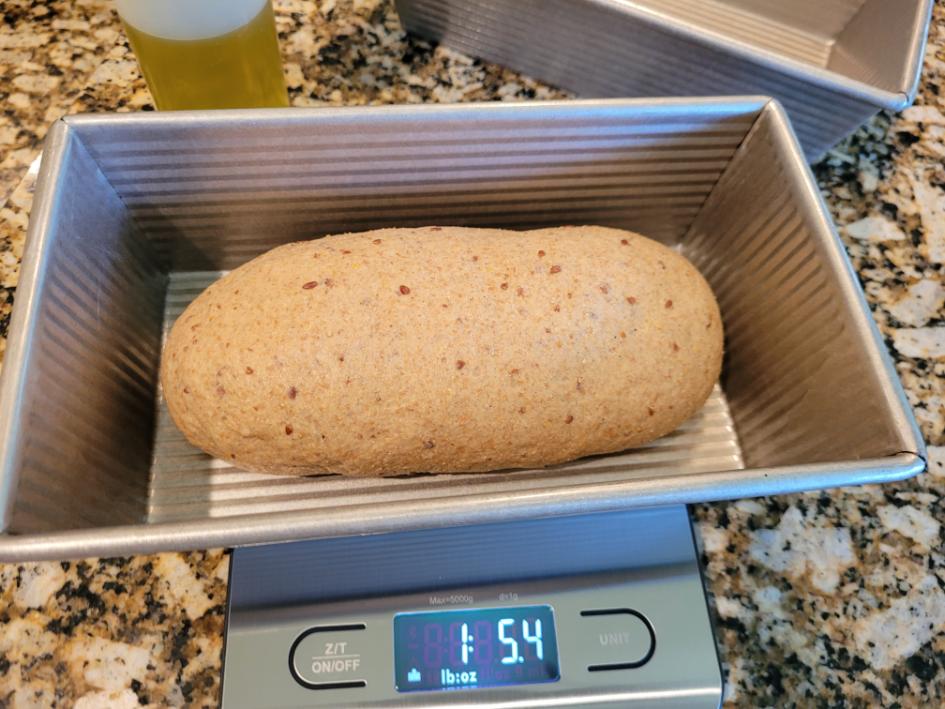
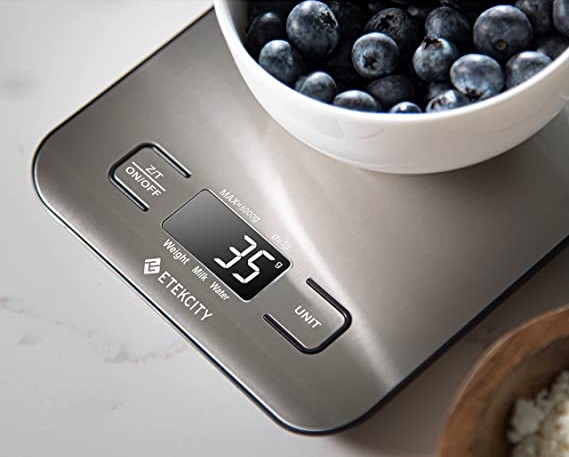
Weighing the Dough
Your dough has been kneaded into a silky ball of softness. It’s time to divide the dough if making more than one loaf. Use a sharp knife or dough cutter/scraper.
When making loaf bread, it is best to weigh each portion for your specific pan size. Different size bread pans require different amounts of dough.
Why weigh your dough?
🍞 Too much dough, the dough can rise outside the pan
🍞 Too little dough, the loaf can be squatty.
🍞 Not to mention, if you are baking multiple loaves at one time they all should weigh the same to cook evenly.
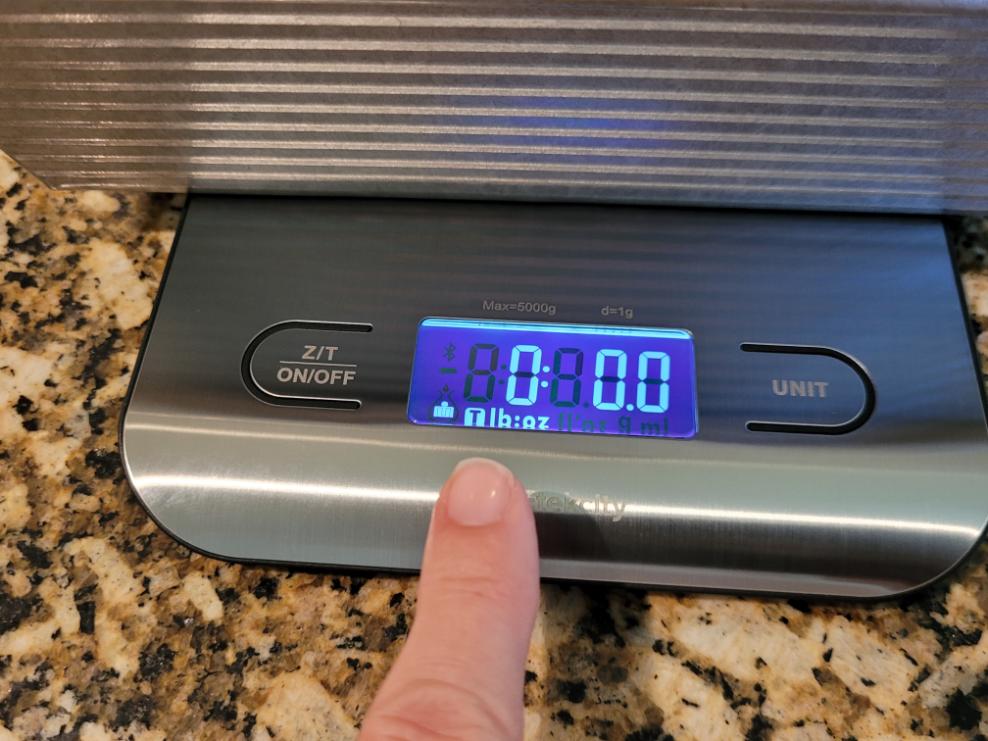
I use a digital kitchen scale for best results.
To calibrate your scale, place the pan on the scale plate; press the start button. this should bring the weight to zero. Place a portion(s) of dough in the pan until it reads the necessary amount.

Dough Weight Per Pan
Guide – How much dough per pan size:
Pan 8-1/2″ x 4-1/2″ = 1 lb. dough
Pan 9″ x 5″ = 1 lb. 5 oz dough
Sandwich size loaf
Pan 10″ x 5″ = 1 lb. 8 oz dough
Family sandwich loaf
Note: For stuffed breads use 2 oz. less dough per pan. Be sure to grease your pan ahead of time; I use butter or coconut oil.
Dough Cutter-Scraper & Digital Kitchen Scale

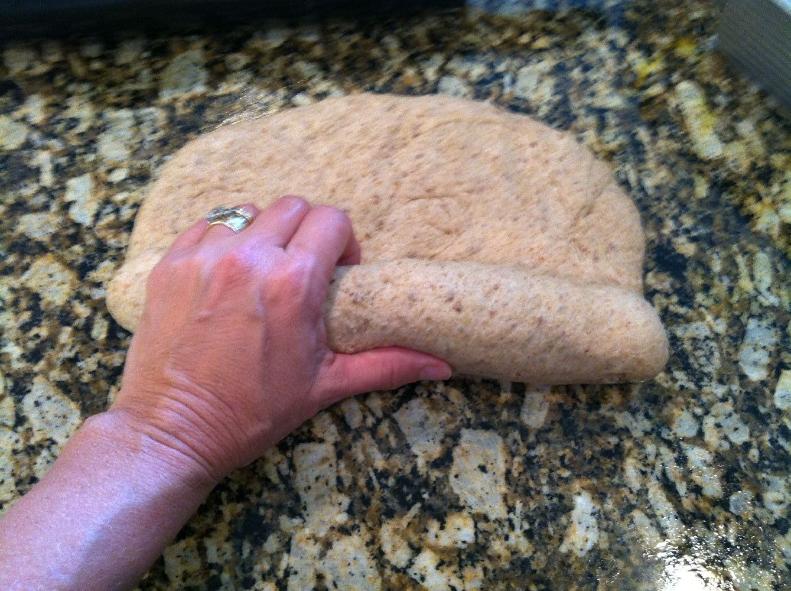
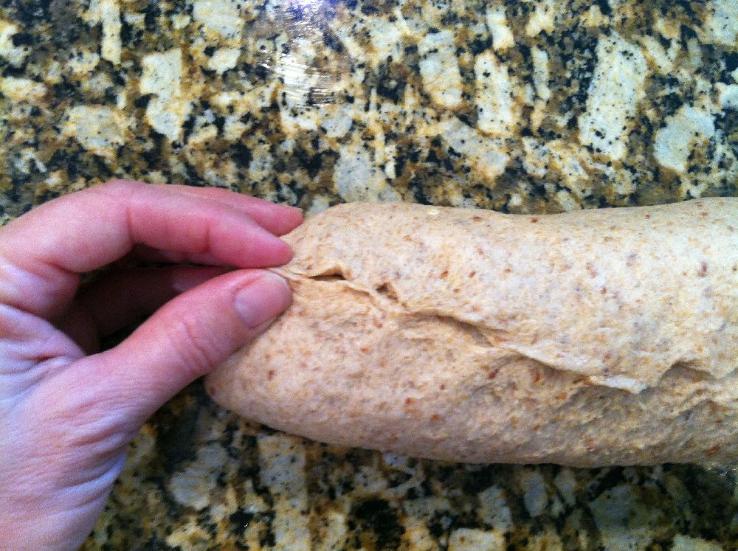
Shaping the Dough
Forming the Dough:
Once the dough is sufficiently developed, it’s time to form the dough and place in your pan. Using a rolling pin or your hands press the dough into a simple rectangle about an inch or so thick and as wide as your bread pan. No need to be precise, just even across the rectangle.
- Press out dough into a basic rectangle
- Roll up the dough – Starting rolling up your dough, tight, like a sleeping bag; pulling back gently with each curl of the dough. This creates surface-tension which will help your dough rise better.
- Pinch the seam,
- Tuck under the ends
- Place your beautiful dough in the bread pan seam side down.
- Cover with plastic wrap or a moistened light-weight kitchen towel to rise.
I prefer plastic wrap because it traps the heat and moisture better than a towel.

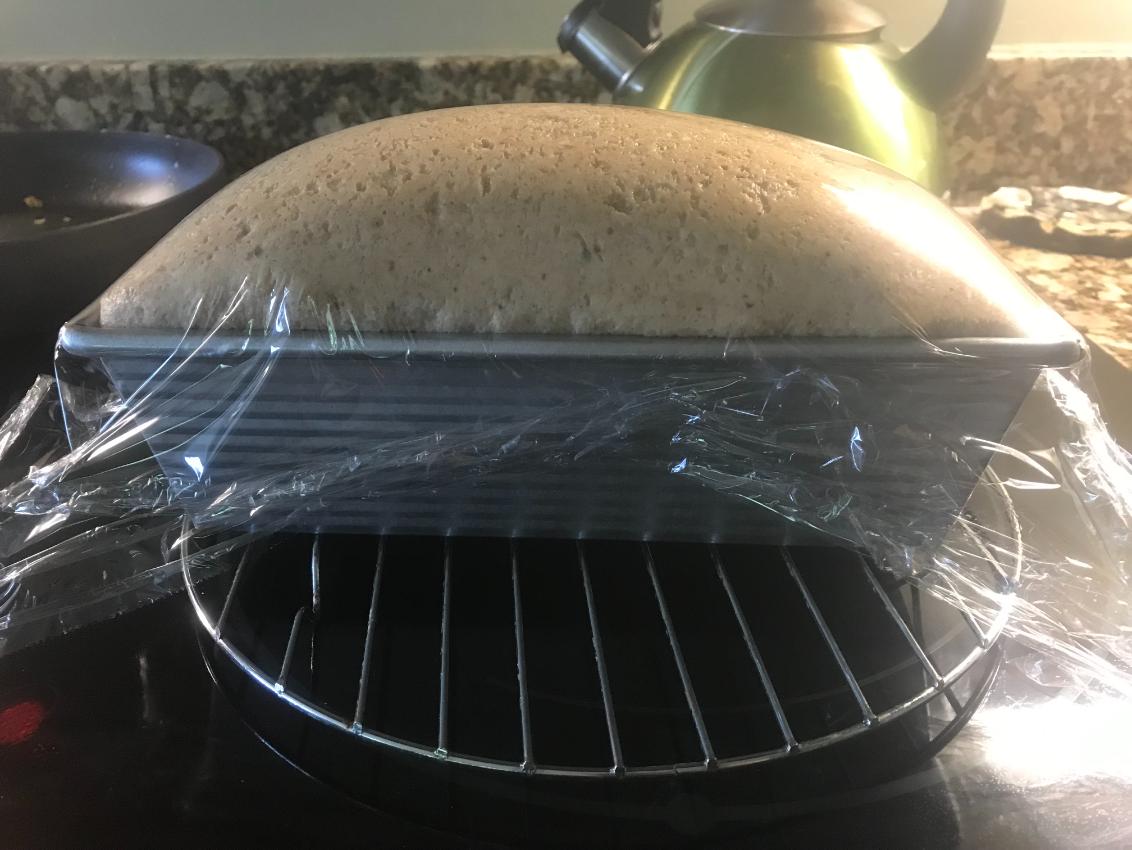
Rising
Yeast dough typically needs to rise at least once or twice depending what type of yeast is being used. The gases require time to develop and expand before baking. There will be additional rising action when the risen pan of dough is placed in the hot oven.
Be sure to grease your pan if needed.
Rapid rise yeast – one rise in the bread pan
Dry active yeast – two rise: once in a bowl, shaped and rise in the bread pan
Simply roll, shape and place in pan.
Cover with plastic wrap or a damp light-weight kitchen towel and allow loaf to rise. Rise until doubled or about an inch or so over the edge of the pan.
Caution: Rising too tall or too long, can cause collapsing of the center during baking.
Where to Rise
A warm draft-free location is the ticket. The pan needs to elevated for good air circulation around the whole pan for more even rising.
Cook Top or Counter Top
Cook Top or Counter Top– Place covered pans on a cooling rack or such. It is not recommended to rise dough filled pans directly on granite, etc. type surfaces; they are naturally cool; this will result in a slower rise and many times only the top of the dough will rise leaving the bottom denser.
In the Oven
Rising in the Oven – Without turning on the oven, place the covered pan in your oven with just the oven light on or a pan of boiling water in the bottom; close the door. The draft-free, warm, moist environment allows the dough to rise – “stretch” better.
Note: I do not recommend turning the oven on, then off and rising that way. This tends to be too hot, the dough rises too rapidly and can deflate your dough.
Refrigerator
Refrigerator – Yes, it can be done. For double rise recipes you can rise your bread in the refrigerator for a slow rise. Place plastic covered bowl in refrigerator; rising for several hours or even over night. When ready, allow dough to come to room temp, then punch down dough, shape, place in bread pan, cover again and allow to rise at room temperature before baking.
Double Rising
Double Rise – Some recipes call for two rise times, one in the bowl and one in the pan.
First Rise: Simply turn out dough onto an oiled surface, knead a few times, form into a ball, place in a bowl large enough for dough to double in size, cover with plastic wrap or damp towel and allow to rise until double – at least 30 minutes or more per the recipe.
Second Rise: Remove cover, punch down dough with your fist, turn out dough again on an oiled surface and shape as desired.
Note: If using the Bosch Universal Plus Mixer or other mixer, no need to remove from bowl; simply place both covers on bowl or cover as above and allow dough to rise till double. When time is up, pulse a few times using the manual switch setting. Turn out dough and shape as desired.
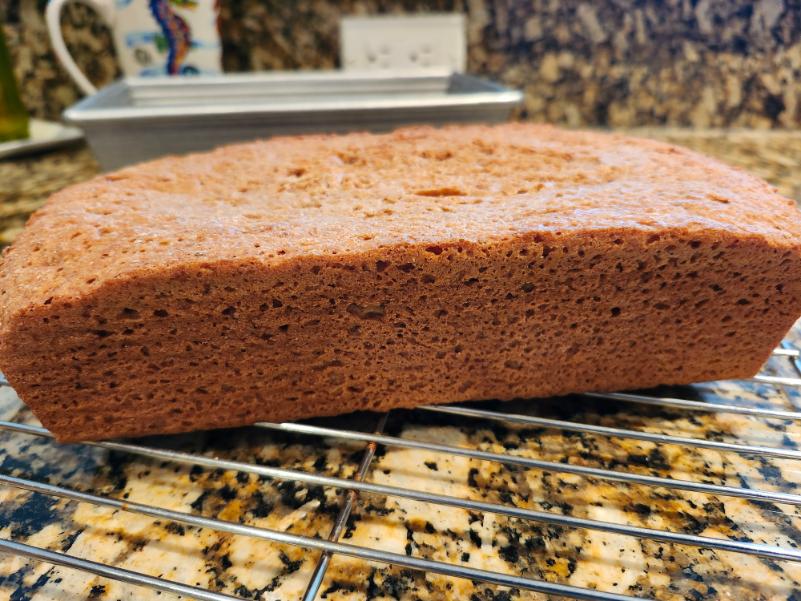
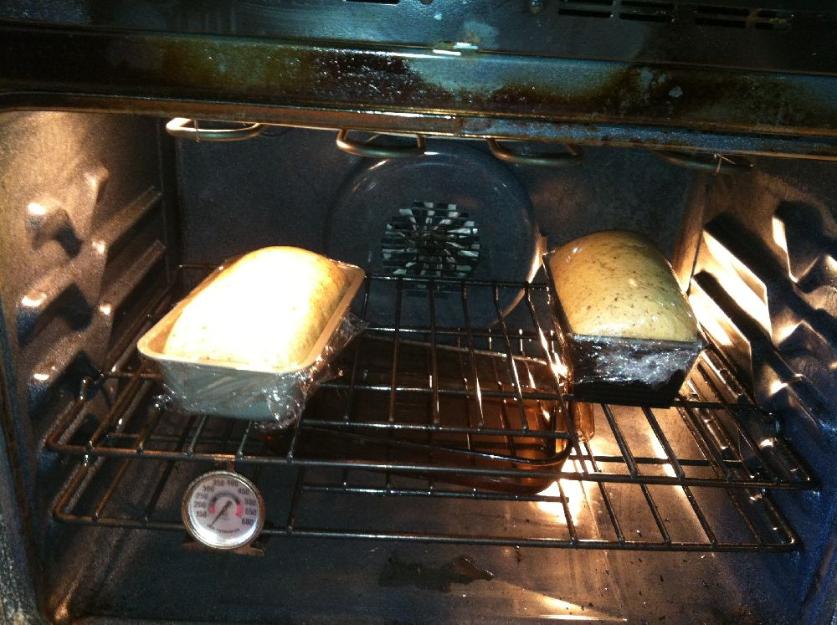
Baking
Yeast breads like a hot oven; so, preheat your oven at least 15-20 minutes before you dough finishes rising. Most loaf breads bake at 350 degrees for approximately 30-40 minutes. If you are using darker pans cut the temp back to 325 degrees.
Loaf yeast breads are finished baking when the internal temp reaches 190 degrees. Use your instant read thermometer sticking the probe in the center of the loaf.
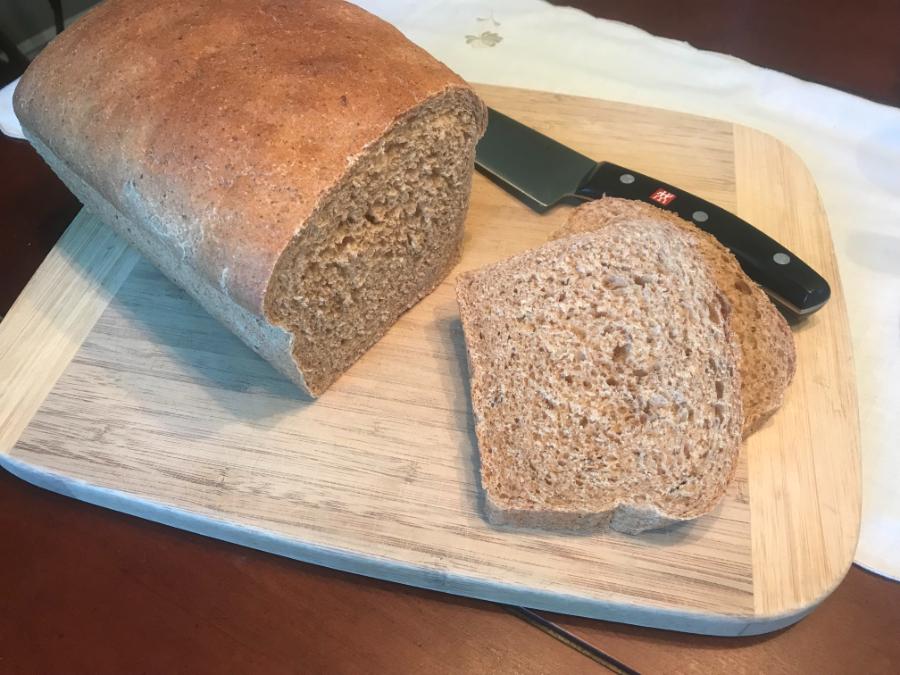
Remove from oven and place on a cooling rack.
Cool for 5 minutes in the pan.
Remove loaf from pan and continue cooling on rack. Loaf should sound hollow when tapped on the bottom.
Note: If you leave the loaf in the pan too long after baking it will become soggy; so, get that bread out of there.
For a softer crust drape a damp towel over the top of the loaf.


Where's the butter? It's time for a slice of that yummy wholesome goodness!
OK, let's get to it then; making some REAL bread using REAL ingredients. You've got this!
Give yourself some grace!
Working with freshly milled grains can be challenging. Remember, it is part science and part art.